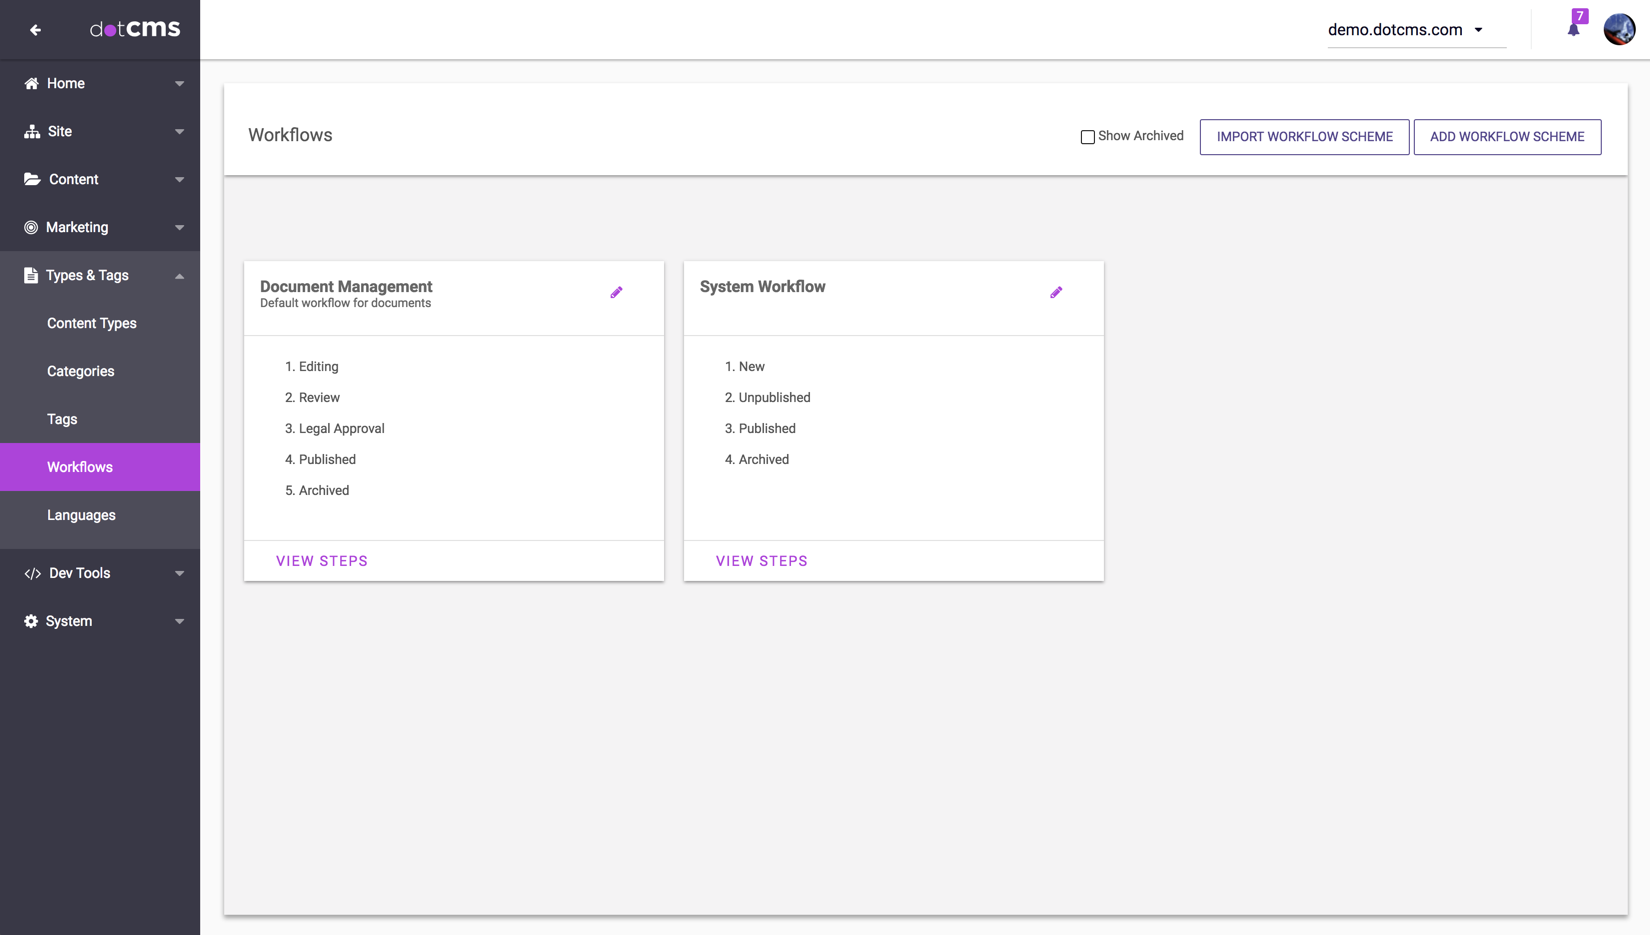
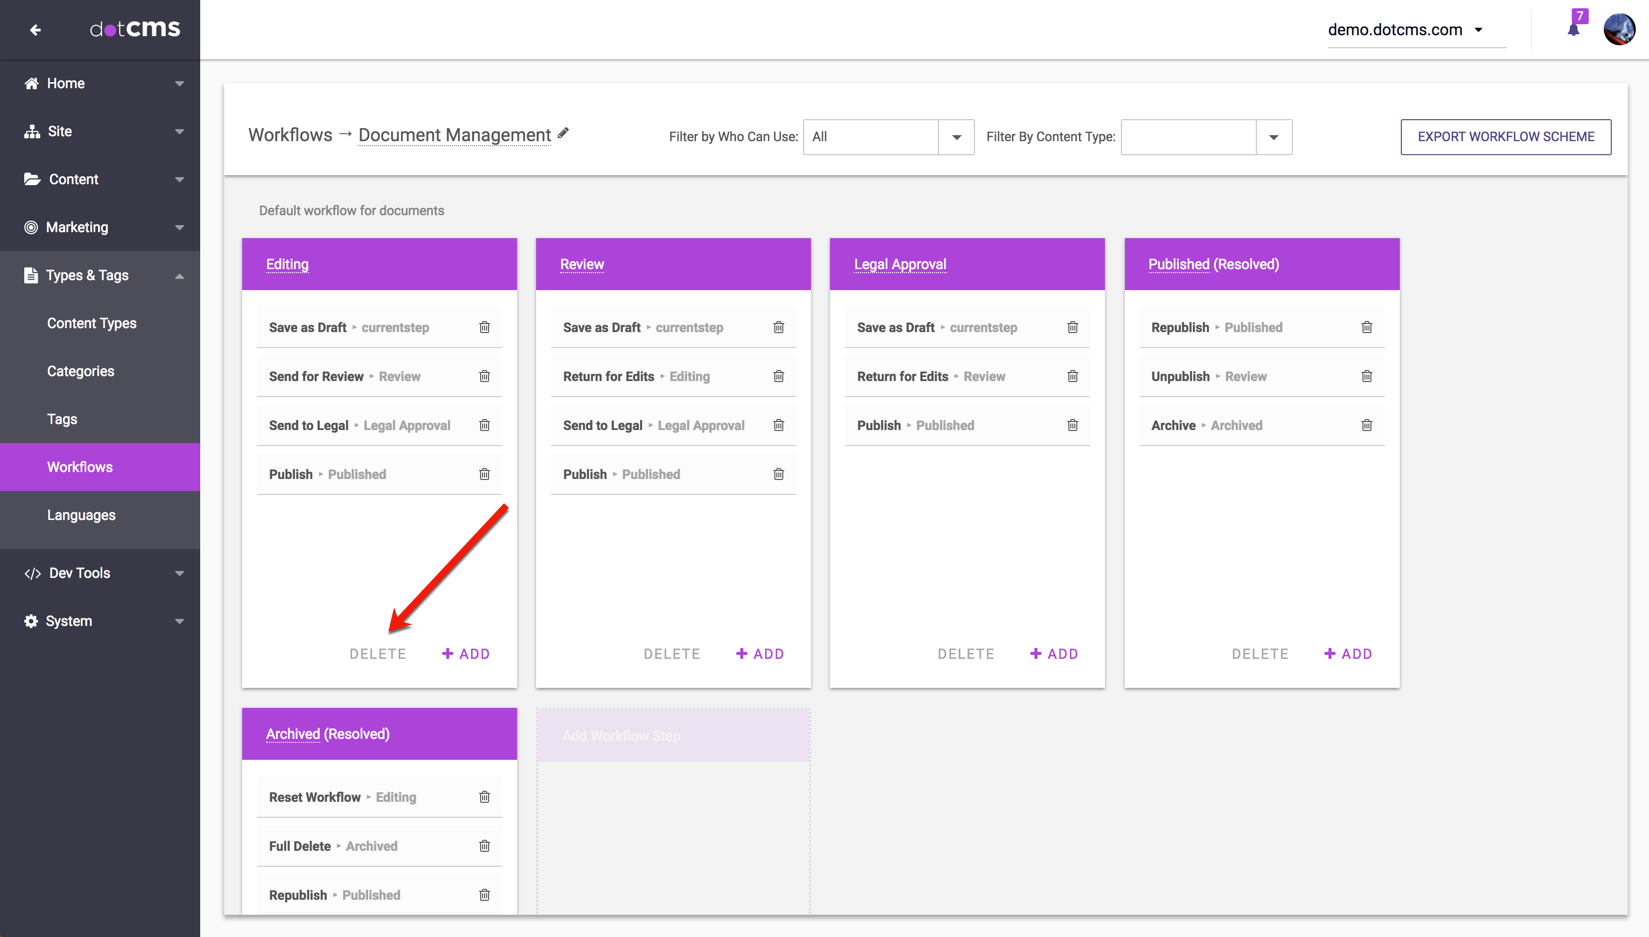
To create or manage Workflows open Types & Tags → Workflows and click to view a list of all current Workflow Schemes.
Workflow Schemes
Default Workflow Schemes
By default you will see the following Workflow Schemes:
| Workflow Scheme | Description |
|---|---|
| System Workflow | The default Workflow Scheme applied to all Content Types by default. Contains core actions (such as Publish, Unpublish, and Archive) that make sense to apply to all but the most specialized Content Types. |
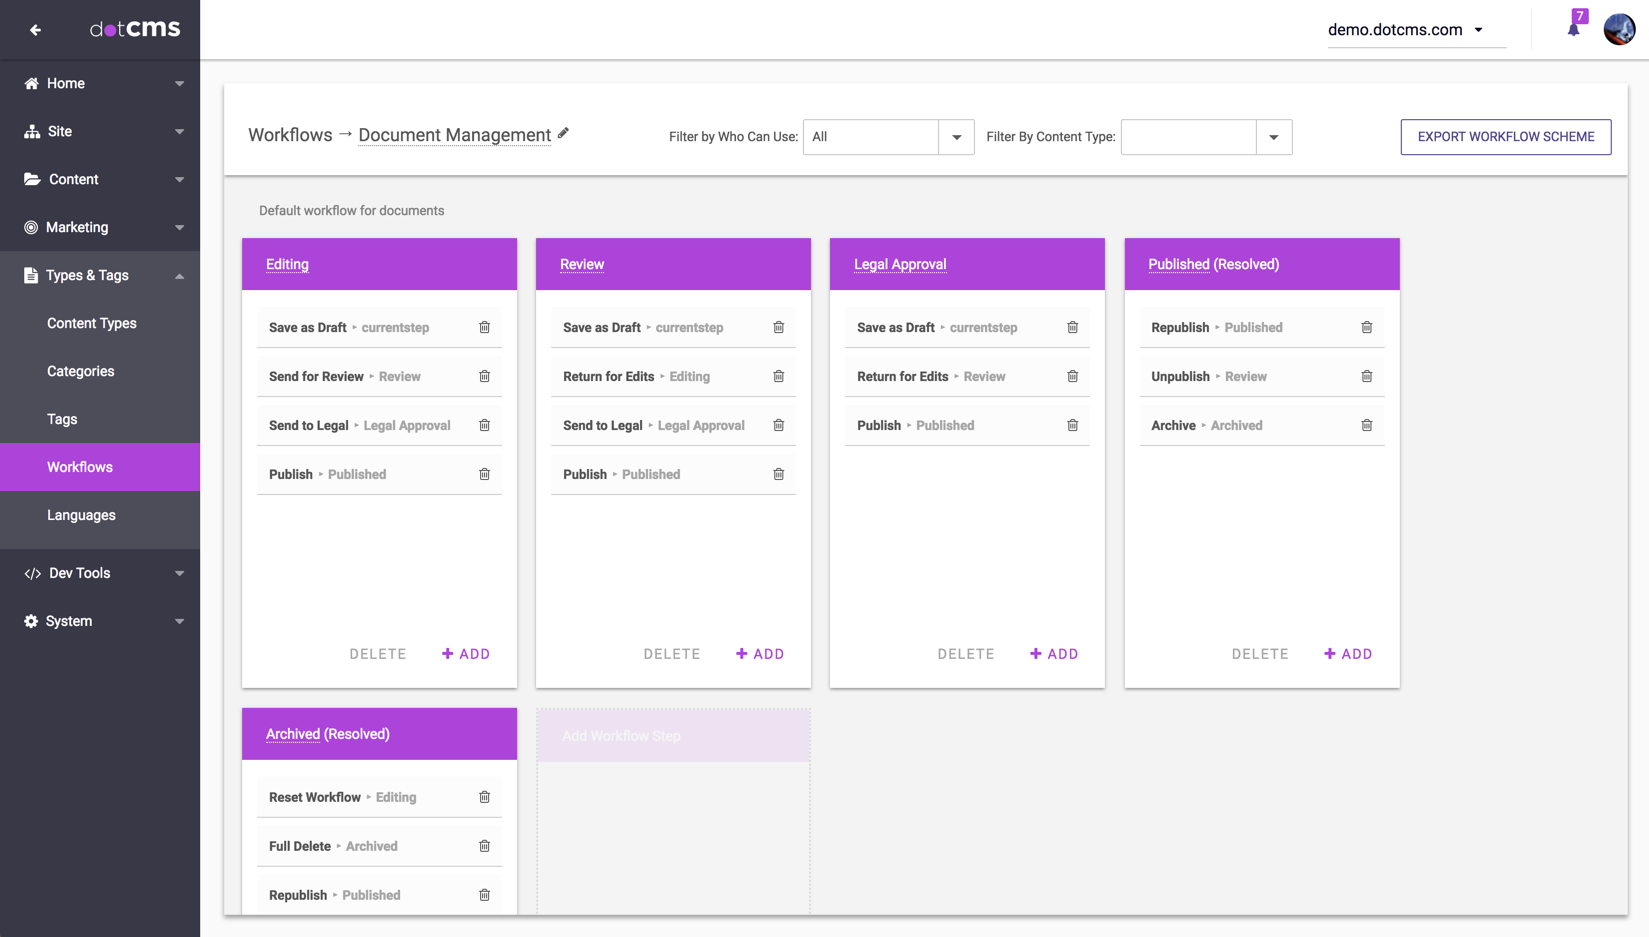
| Document Management | An example of a more complex Workflow Scheme with multiple Workflow Steps and actions appropriate for different types of users in each step. You may wish to use this as a base to create your own new Workflow Schemes. |
Adding and Editing Workflow Schemes
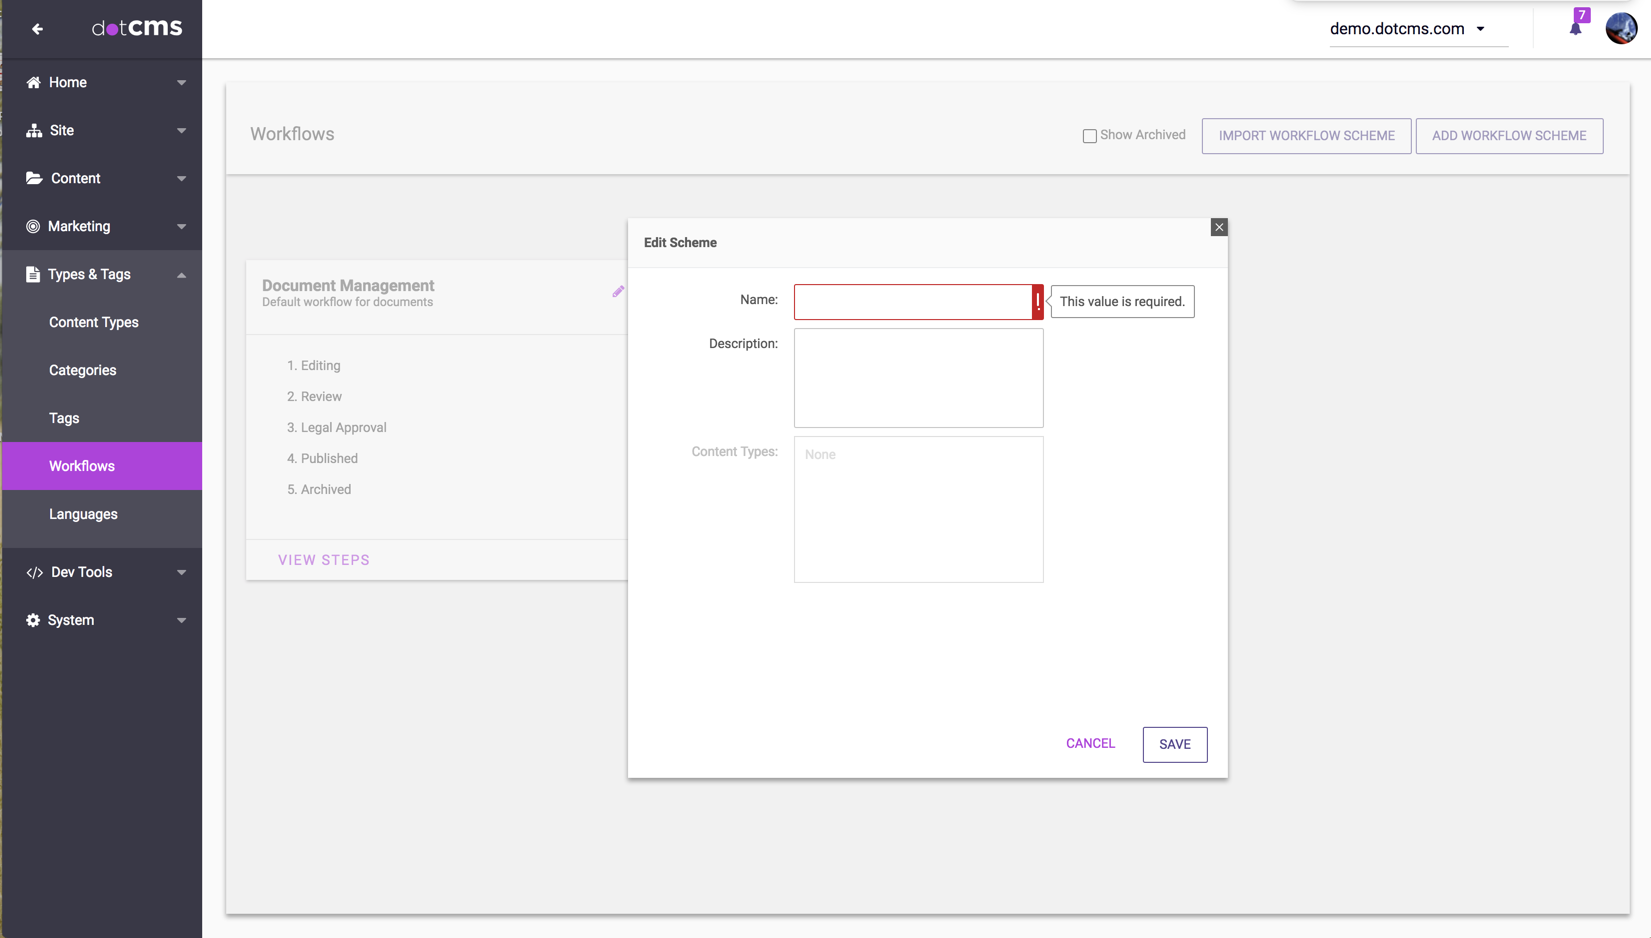
To create a new Workflow Scheme, click the Add New Workflow Scheme button. On the popup window enter the following information:
| Property | Description |
|---|---|
| Name | Workflow Scheme Name |
| Description | Description of the Workflow Scheme |
| Archived | Select this to Archive the Workflow scheme When a Workflow Scheme is archived, content which is within a Step in the Workflow Scheme will be reset so it is not in any step in any Workflow Scheme. |
If you select an existing Workflow Scheme, you will see a list of all Workflow Steps for the Scheme, and the Workflow Actions in each Step.
Workflow Steps
Adding and Editing a Workflow Step
To add a new Workflow Step, click Add Workflow Step.
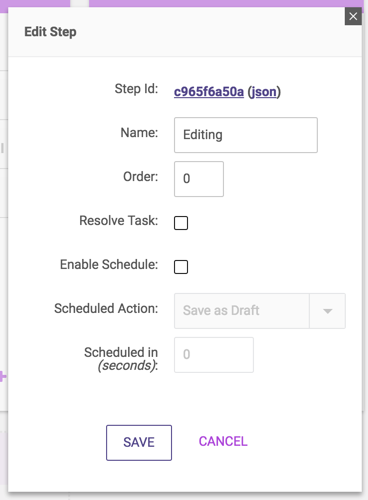
To edit the properties of a Workflow Step, click the Step name to open a popup which displays the properties of the Step:
| Property | Description |
|---|---|
| Name | Name of the Workflow Step |
| Order | Sort order. Used to specify the order the Workflow steps appear in the Scheme. |
| Resolve Task | If true (checked), any content which enters this Workflow Step will be considered Resolved. Content which is in a Resolved Workflow Step will not appear in the Workflow queues of any users. |
| Enable Schedule | If true (checked), a Workflow Action will be performed automatically on content which has been in this Workflow Step for a specified period of time. |
Deleting a Workflow Step
To delete an existing Workflow Step, select “DELETE” on the Workflow Step panel.
Workflow Actions
- To add a new Workflow Action, click the “+ ADD” button on the panel of the Workflow Step that you want to add it to.
- To copy an existing Workflow Action from one Step to another Step, drag and drop the Action from the Step it's currently in to the new Step.
- When you copy an Action in this way, the Action behaves the same in all Steps it has been copied into, and editing the Action from any of these Steps will change the Action for all Steps it has been copied into.
- Note that when you move your mouse over an Action, that Action is automatically highlighted. When you have copied an Action into multiple Steps, the Action will be highlighted in all the Steps it has been copied into, giving you a clear visual indicator of which Steps use that Action - and thus which Steps will be affected if you edit the Action.
- To delete a Workflow Action from a Step, click the delete (garbage can) icon next to the Action in the Step you want to remove it from.
- NOTE: Deleting an Action from a Step does not remove the Action from the Workflow or the system, even if the Action no longer exists in any Step. This ensures that when you copy an Action to multiple Steps, deleting the Action from one Step does not remove it from the other Steps it was copied to.
- To edit an Action, click on the name of the Action in any Step it is in.
Editing Actions
When you create a new Workflow Action or edit an existing Action, the Workflow Action screen will open, and you will be able to edit the following information for the Action.
| Section | Description |
|---|---|
| Name | The name of the Action. Although the name does not need to be unique, it is recommended that all Actions within the same Workflow Scheme have unique names to avoid confusion. |
| Next Step | The Workflow Step that the content will change to when this Action is executed. For an Action that should not change the Workflow Step - especially an Action that may be shared among multiple Workflow Steps - select Current Step. |
| Who Can Use | Which users and/or Roles have permission to execute this action. |
| Show When | When the Action will be displayed in the list of available Actions for content. |
| Comments and Assigns | Which user or Role will be assigned the content item when the Action is executed, as well as what information (including comments) the person taking the Action will be prompted for. |
| Sub-action | The Workflow Sub-Actions which will be performed when this Action is executed. The Sub-Actions determine the actual work the Workflow Action does (such as locking/unlocking the content, saving and publishing the content, and sending notifications that the Action was taken). |
Who Can Use
- You can specify any number of Roles and individual users who have permission to execute the Action.
- If you are defining this through API calls, use the role's key rather than its name.
- If you don’t select any user or Role the action will not be available to any users (even administrators).
- Users who do not have permission to execute the Action will not ever see the Action appear in their list of Actions for any content (regardless of their permissions on the content).
- Users who have permissions to execute the Action, but do not have appropriate permissions for the content in question may still see the Action when viewing that content, but if so, will receive a permission error when they attempt to execute the Action for that content.
To specify that the permissions of the Action should be based on the permissions the user has on the content (rather than treating the Action permissions separately), you may select one of permissions listed below, provided alongside some internal identifier strings that can be used when assigning them via API:
- Anyone who can View Content
cms_workflow_any_who_can_viewor0f995057-5c35-4ae7-998a-774dda146c63
- Anyone who can Edit Content
cms_workflow_any_who_can_editor617f7300-5c7b-463f-9554-380b918520bc
- Anyone who can Publish Content
cms_workflow_any_who_can_publishorc3eb4526-6d96-48d8-9540-e5fa560cfc0f
- Anyone who can Edit Permissions Content
cms_workflow_any_who_can_edit_permissionsor52181fb6-65c8-4221-8d17-1da8b0e20784
- CMS Anonymous
654b0931-1027-41f7-ad4d-173115ed8ec1
The permissions required for a user to execute the Workflow Action is the one that matches the permission specified.
Show When
You may specify where the Action will be available, to ensure that the Action only displays when it makes sense for your users to see and execute the Action.
There are three different sets of conditions you can specify in the Show When section. The Action will only be displayed if all of these conditions are true for a content item (meaning, in development terms, that these conditions are all combined with 'AND').
Editing and Listing: Which screens the Action is displayed on
| Show When | Description |
|---|---|
| Editing | When the content is being edited, primarily in the Content editing screen. |
| Listing | Any place where a list of multiple content items are displayed, such as the Content Search screen and the Site Browser. |
Locked and Unlocked: The lock state of the content item
| Show When | Description |
|---|---|
| Locked | The Action will only show for content which is currently locked, and only for the user that has the lock on the content. |
| Unlocked | The Action will only display if no user has a lock on the content. The Action will display for all users who have permission for the Action. |
New, Published, Unpublished, Archived: The publishing state of the content
| Show When | Description |
|---|---|
| New | The Action will only display for new content which has not yet been saved (even as a draft). |
| Published | The Action will only display for content which has been published (has a live version), and does not have a working version different from the live version. |
| Unpublished | The Action will only display for content which is unpublished (has a working version which is different than the live version), and which is not Archived. |
| Archived | The Action will only display for content which has been Archied. |
| All | You may check or uncheck this to check or uncheck all of the other four checkboxes at once. |
Comments and Assigns
| Parameter | Description |
|---|---|
| User can Assign | If checked, the user executing the Action will be prompted to choose a specific user from among all users that are members of the Role specified in the Assign To field.If this is not checked, the user executing the Action does not have any choice about who the content is assigned to when the Action is taken. |
| Allow Comment | If checked, the user executing the Action will be prompted to enter comments before the Action is executed. Note: Comments are optional, so users may leave the comment blank when prompted. |
| Assign To | Select the user or Role that will be assigned the content (as a Workflow Task) when the Action is executed. If User can Assign is checked and a Role is selected here, then when a user executed the Action the user will be able to select either the Role or one of the users that has been assigned Role. |
| Include Users from Parent Roles | If Assign To is set to a Role, and User can Assign is checked, then the user executing the Action will be able to select both members of the specific Role specified, and users from any of the Parent Roles that the specified Role is a descendant of. |
| Custom Code | If code is entered, the custom code will run on the popup window that is opened when the action is clicked on. The code may be any type of code dotCMS can display, including HTML, Velocity, Javascript, etc. |
Workflow Sub-Actions
The Sub-Actions section displays a list of all the subactions this Action will perform when it is executed.
- You may add Sub-Actions by selecting the appropriate Sub-Action from the drop-down list.
- You may delete Sub-Actions by clicking the delete (garbage can) icon next to the Sub-Action.
- You can change the order that Sub-Actions are executed by dragging and dropping the Sub-Actions listed.
For more information on Workflow Sub-Actions, please see the Workflow Sub-Actions documentation.
Default Workflow Actions
When you perform an operation on content using a method which doesn't execute a specific Workflow Action – such as when Push Publishing the content to a remote server or saving the content using dotCLI – the operation will be performed using the Default Workflow Action specified in the Content Type for that operation.
The Default Actions for each operation are defined in the Content Type properties. Which Default Action is used depends on the type of operation being performed on the content; you may specify different default actions for different types of operations such as SAVE or PUBLISH.
The following operations may each be assigned a different Default Workflow Action within each Content Type:
| Operation | Performed When | Examples |
|---|---|---|
| NEW | New content created | New file uploaded using dotCLI; New content created via save or publish with the Content API. |
| EDIT | Content edited | File contents replaced via dotCLI or Push Publishing. |
| PUBLISH | Content published | File published via dotCLI, or content Published via Push Publishing. |
| UNPUBLISH | Content unpublished | Unpublished content pushed via Push Publishing. |
| ARCHIVE | Content archived | File deleted via dotCLI, Archived content pushed via Push Publishing. |
| UNARCHIVE | Content unarchived | Unarchived content pushed via Push Publishing. |
| DELETE | Single content version deleted | |
| DESTROY | All content versions deleted |
When Default Workflow Actions are Performed
Default Workflow Actions will be performed in the following circumstances:
- When Importing content, and a Workflow Action is not explicitly selected.
- When new content is created using the Translate Content Workflow Sub-Action.
- When using the original Content API to create, update, or delete content.


