Take the following steps to configure a new scheduled job or modified an existing one. Please note: Time Machine snapshots need to be scheduled, they don't run by default.
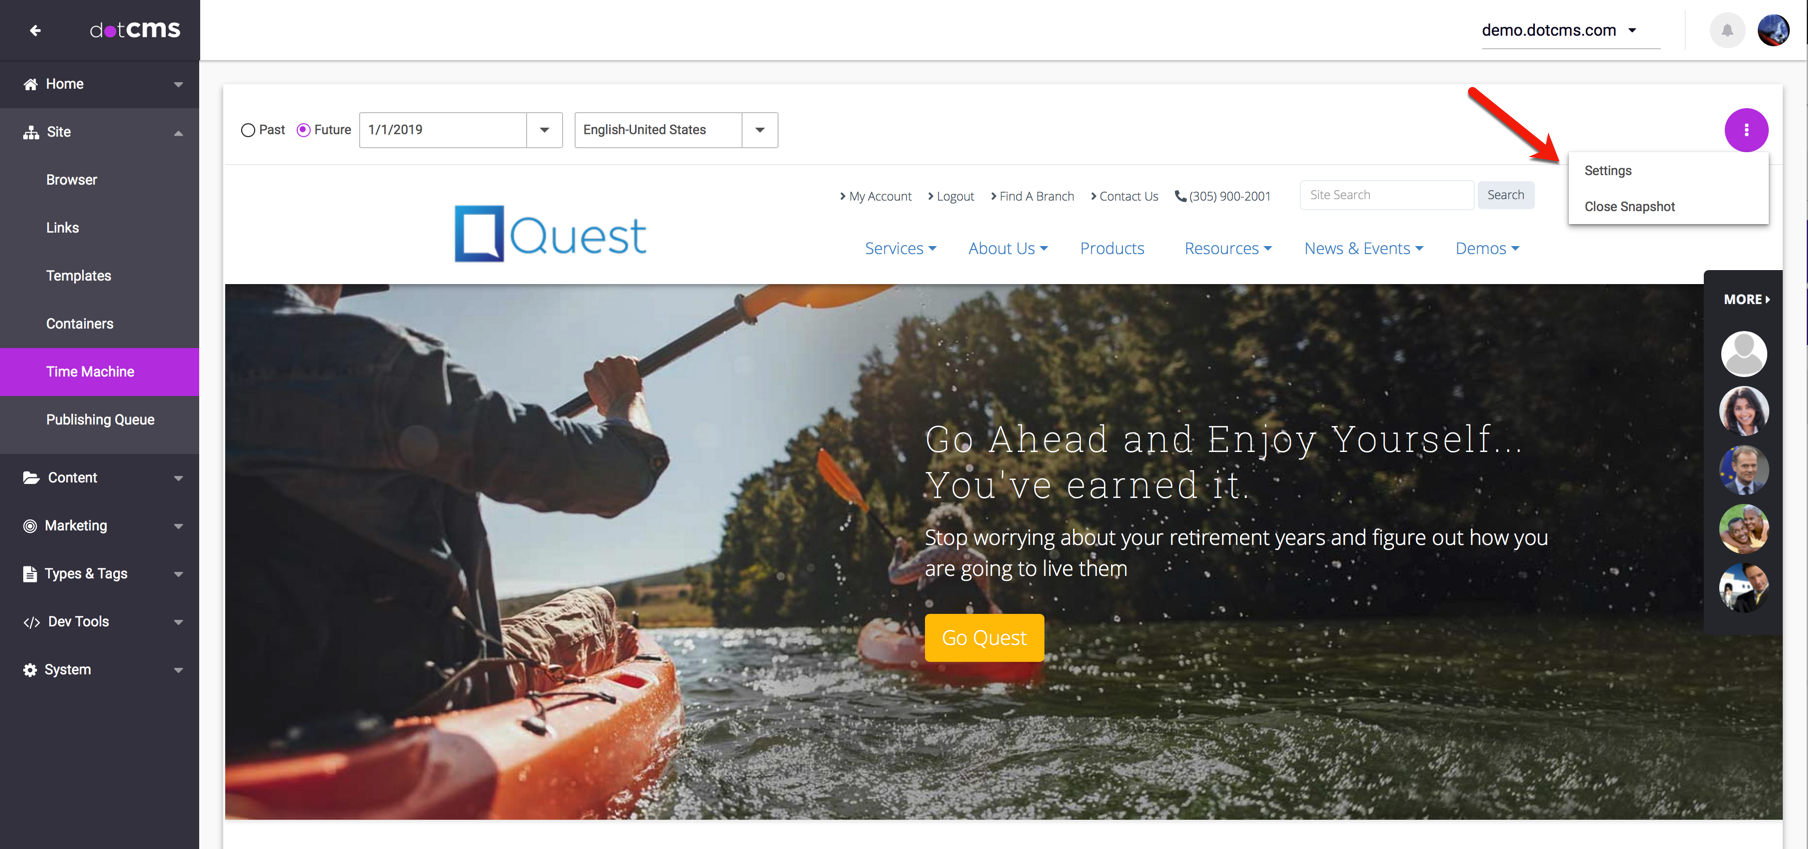
Click on Site → Time Machine
Then, in the Time Machine view, click on the action palette to the right of the screen, and choose Settings:
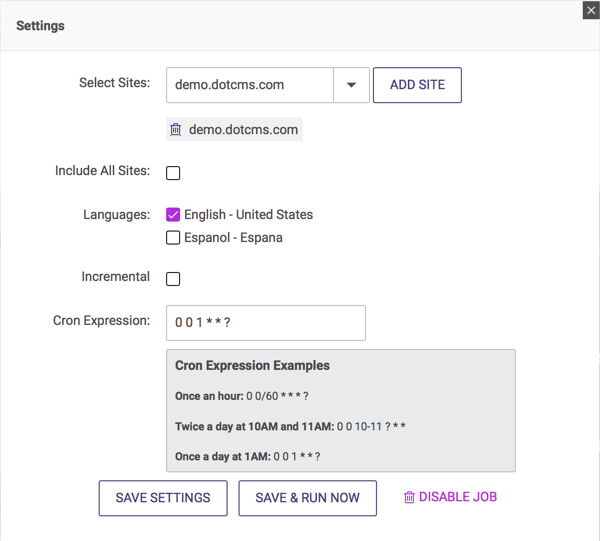
A popup dialog will appear to create a new time machine job:
- Select the host(s) to add to the Time Machine snapshots, or check the box: Include All hosts.
- Select the language(s) to add to the snapshots. At least one language needs to be selected.
- Enter a cron expression that will determine when the job is going to run. Some examples of cron expressions are displayed below:
Once an hour: 0 0/60 * * * ?
Twice a day at 10AM and 11AM: 0 0 10-11 ? * *
Once a day at 1AM: 0 0 1 * * ?
- Click on Save Settings to save them as a new scheduled job, or click on Save & Run Now, to save the settings and run the job immediately.
Once the job has been saved it will keep running unless the settings are modified in this dialog again.
The generated bundles can be found under:
<span>dotCMS/assets/bundles//tm_<<jobid>></span>
The file dotCMS/assets/bundles/tm_<<jobid>>/bundle.xml contains information about the host and the bundle’s start and end date/time.
<entry>
    <string>hostName</string>
    <string>demo.dotcms.com</string>
</entry>
```
<entry>
 <string>START_DATE</string>
 <date>2012-10-26 12:31:17.702 EDT</date>
 </entry>
 <entry>
 <string>END_DATE</string>
 <date>2012-10-26 12:31:46.148 EDT</date>
 </entry>
Each bundle takes one live and one working snapshot for each language configured in the scheduled job. The result folders look like this:
Live and working for language English (id:1)
dotCMS/assets/bundles/tm_1351269106029/live/demo.dotcms.com/1/
dotCMS/assets/bundles/tm_1351269106029/working/demo.dotcms.com/1/
Live and working for language Spanish (id:2)
dotCMS/assets/bundles/tm_1351269106029/live/demo.dotcms.com/2/
dotCMS/assets/bundles/tm_1351269106029/working/demo.dotcms.com/2/


