The following form documentation discusses creating basic “no-code” forms using the back-end Forms tab. For more advanced code forms with complete form field control, please review the ContentAPI Form examples.
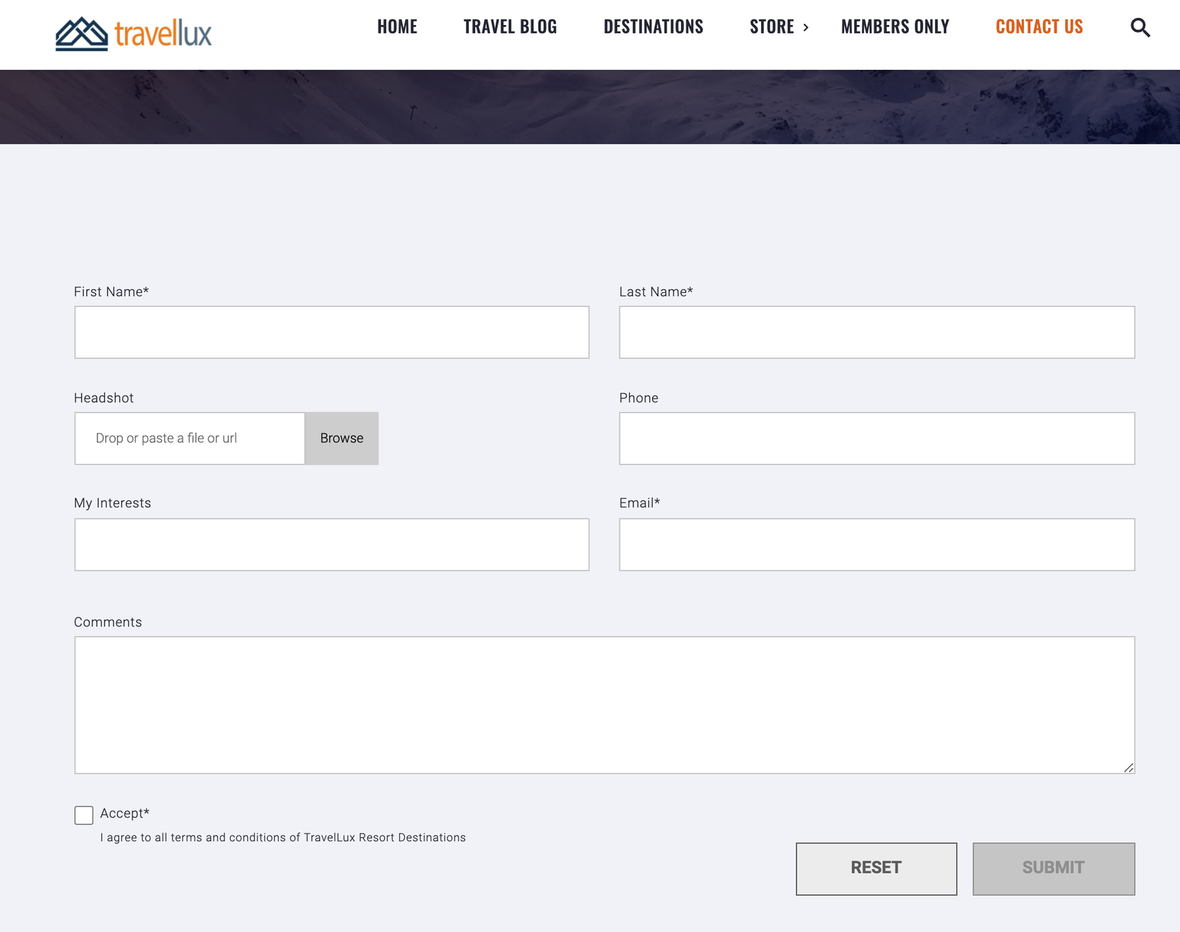
Complex, reusable forms can be created in dotCMS in a few minutes without any knowledge of HTML or Velocity through the use of the Form Content Type. Emailing of the form, form field styling, and form validation all are handled automatically when placing a piece of form content on a page. Follow each of the following steps to create a fully functioning form, such as the one seen below, in dotCMS.
Form validation details are available at Form Validation.
Form Fields
Every Form Content Type has four System fields which are added to the Content Type automatically (and can't be removed):
| Field | Description | Details |
|---|---|---|
| Form Title | The Title of the form to be displayed to the user. | This is not the Title of the submitted content. If there is a Title field added to the form, that will be used as the title of the submitted content; otherwise the title of submitted content will be determined automatically. |
| Form Email | The address emails will be sent to when the form is submitted. | An email will only be sent to this address if the executed Workflow Action contains a “Send Email” Sub-action. The “Send Email” Sub-action will use this email address by default (if no other email address is specified in the Sub-action). |
| Form Return Page | The Page to redirect the user to after the form is submitted. | |
| Form Host | The Site the form was submitted from. | This will be filled in automatically upon submission. |
These are hidden fields, which are not shown when the form is displayed to the user.
Creating a Simple Form
First create a “thank you” page in dotCMS that has a message for front end clients after they have completed submitting the form. Copy/record the relative path to this page for use in your form. Now you are ready to begin creating your Form.
Steps to Creating a Form
Users who are permissioned to create forms can hover over the Marketing category on the left sidebar and click on “forms” from the drop down menu. From the forms tab users can click on the plus sign button in the top right of page the to create a new Form.
Title the Form in the Form Name field. You can chose what location to save your form, what workflow to follow and what default action to perform. Saving the Form Content Type is required before fields can be added to the form.
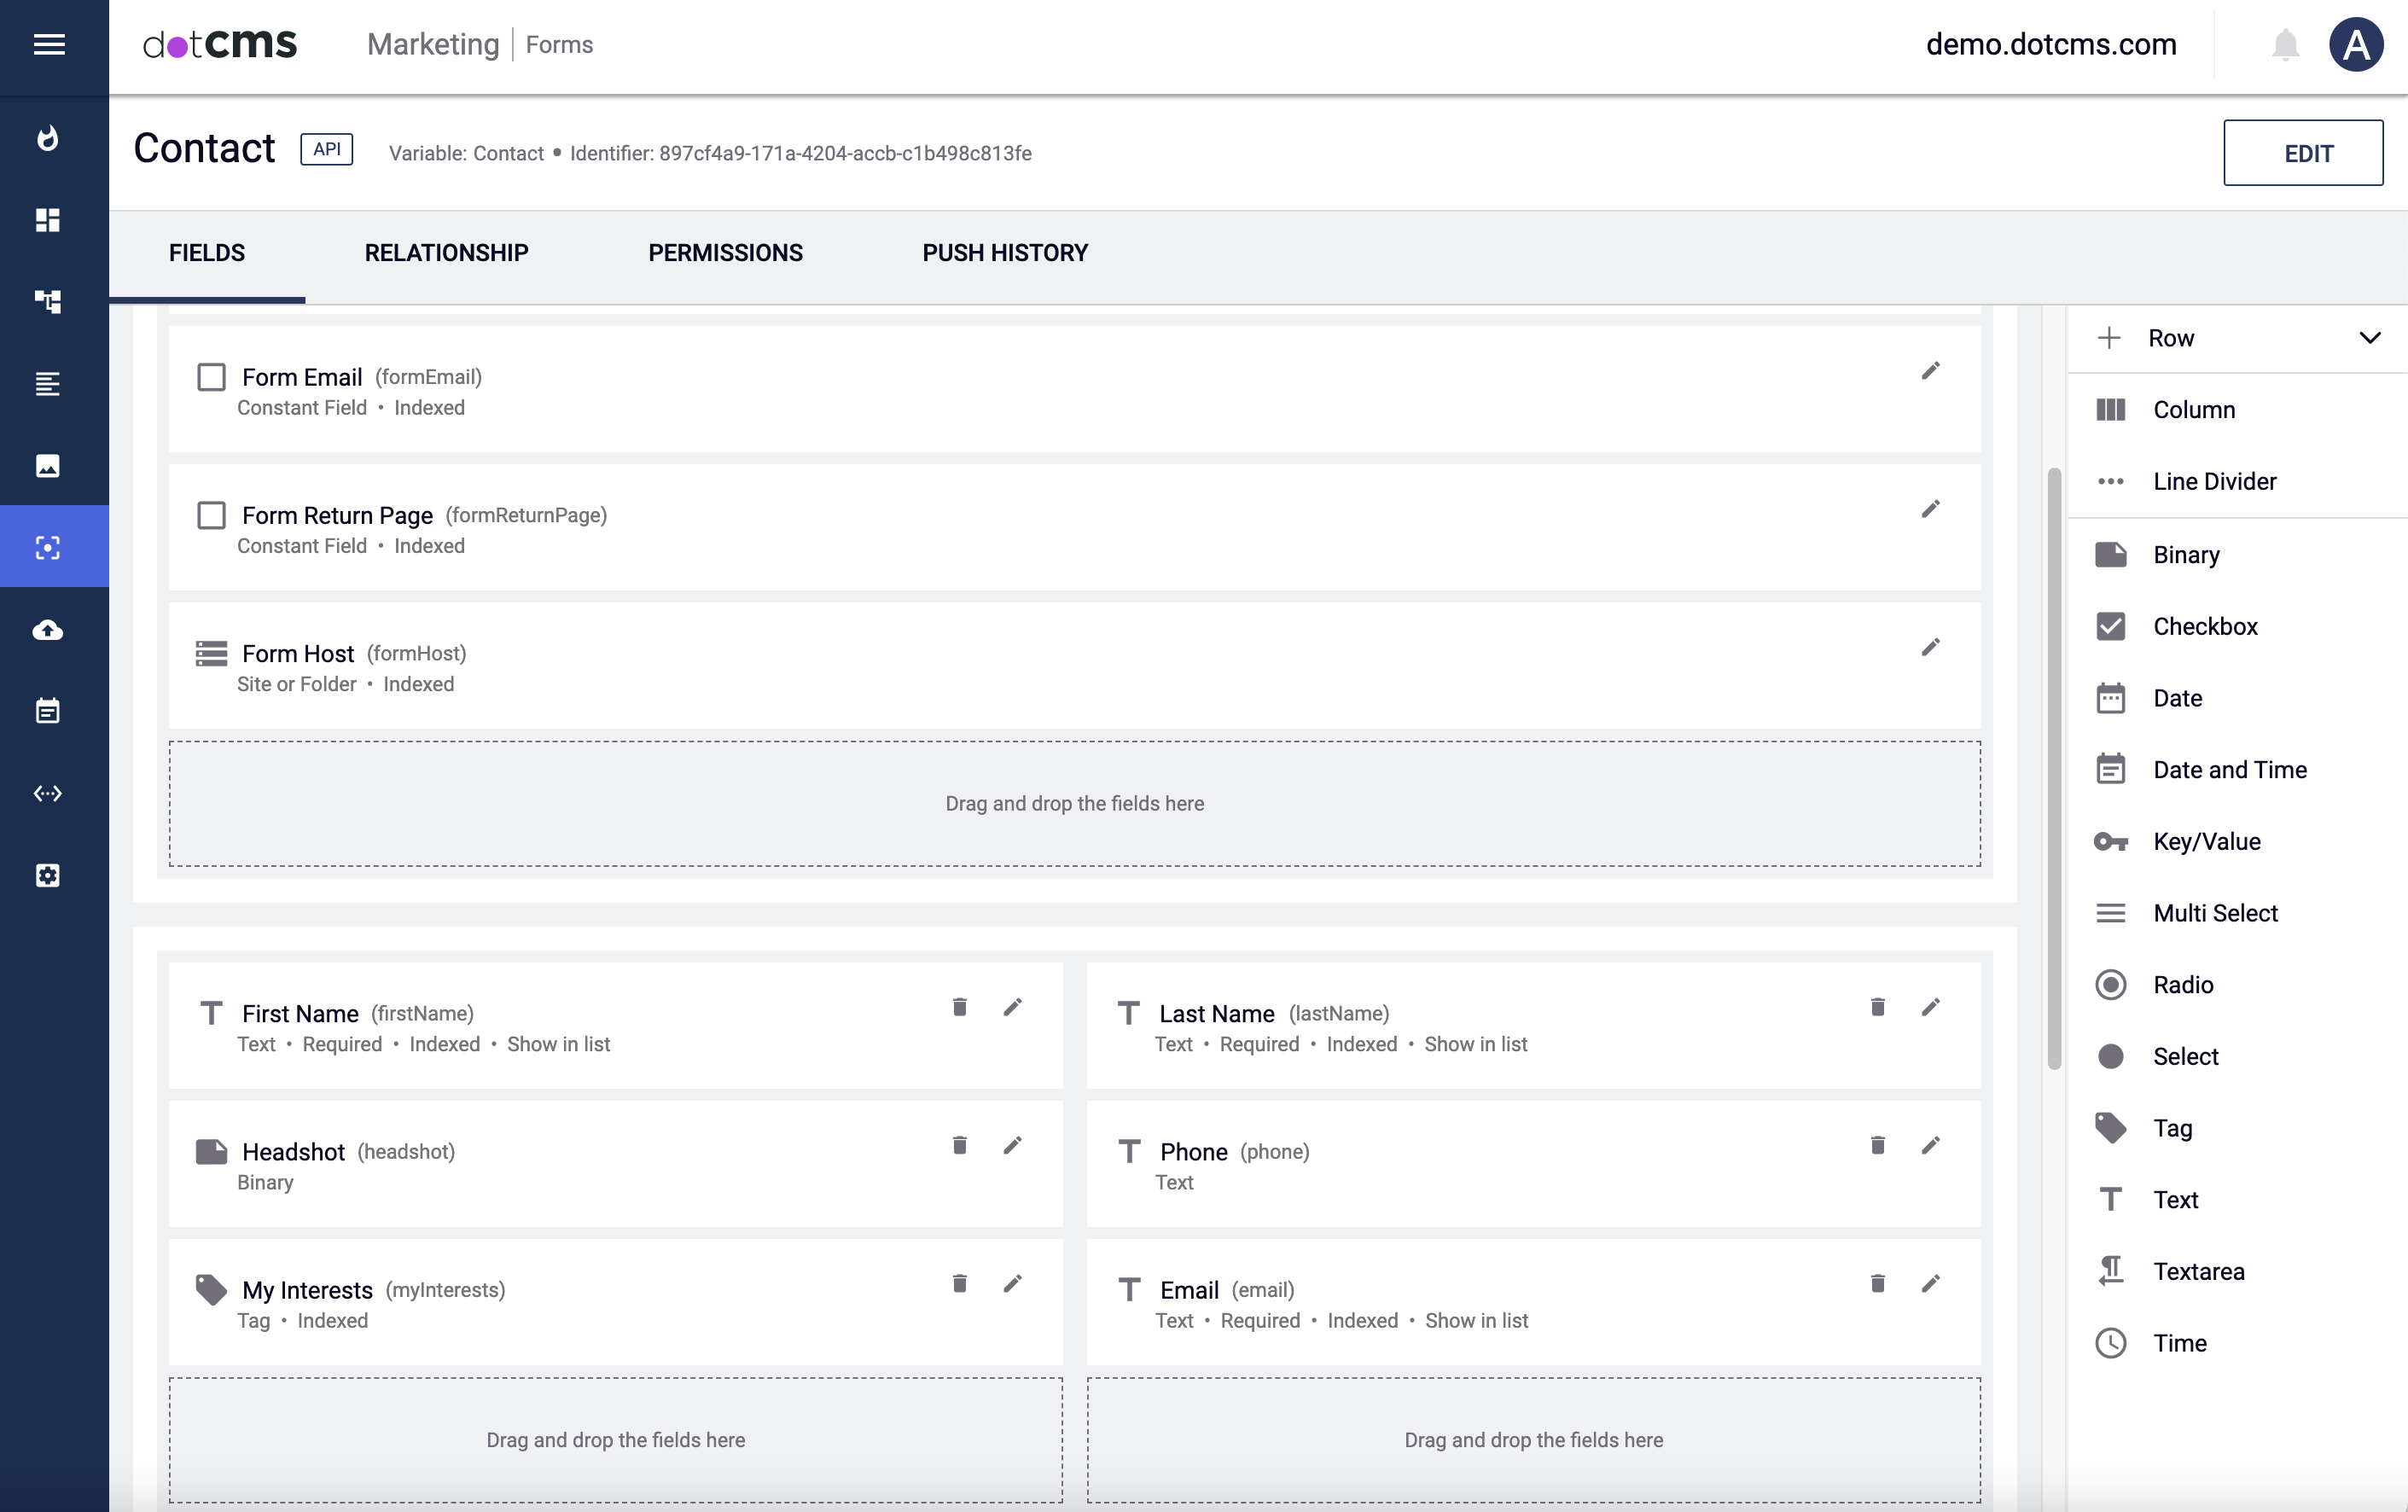
After saving the Content Type, click on the pencil icon next to all of these fields except the Form Host, to enter these values to the form. The form host will be recorded in the form submission depending on which host that the front end user submits the form content from:
- Form Email: is the email address of the form administrator(s) who will receive notifications after each form submission. More than one email can be added as a comma separated list.
- Success Callback The Success Callback is typically the location of the “thank you” page where front end users are redirected after a successful form submission. EX: window.location='/thank-you?id=' + contentlet.identifier
- Form Host: The form host is the recorded domain or website the form content was submitted from. This allows one form to be utilized on many different websites but still allows dotCMS to track from which website the form submission came from and even to automatically differentiate user access to form content and direct form email notifications based upon the the site the form submission came from.
New fields can now be added to the form by dragging fields over from the right menu. Fields of any type can be added to a form. The “Name” of each field becomes the label for that field on the form when it is placed on an page. You can also add columns or rows using the right menu. For more information see the documentation on Standard Field Types.
After placing all the desired fields in the form, visit/create the page where you would like to place the form.
Click on the “Add Content” button on any container on the page, then click on “Add Form”
Search/select the form by title to place the form on the page.
Publish the page using the “Publish Page” button on the page. The form should now be complete and ready for testing - If there are any problems viewing the form from the front end, check the permissions on the form to make sure that the “CMS Anonymous” permission exists on all of the dotCMS objects on the page, including the HTML page itself and the form content. For more information please see the Permissions documentation.
The dotCMS server must be set up to handle email traffic for the proper submission of front-end forms.
Files in Forms
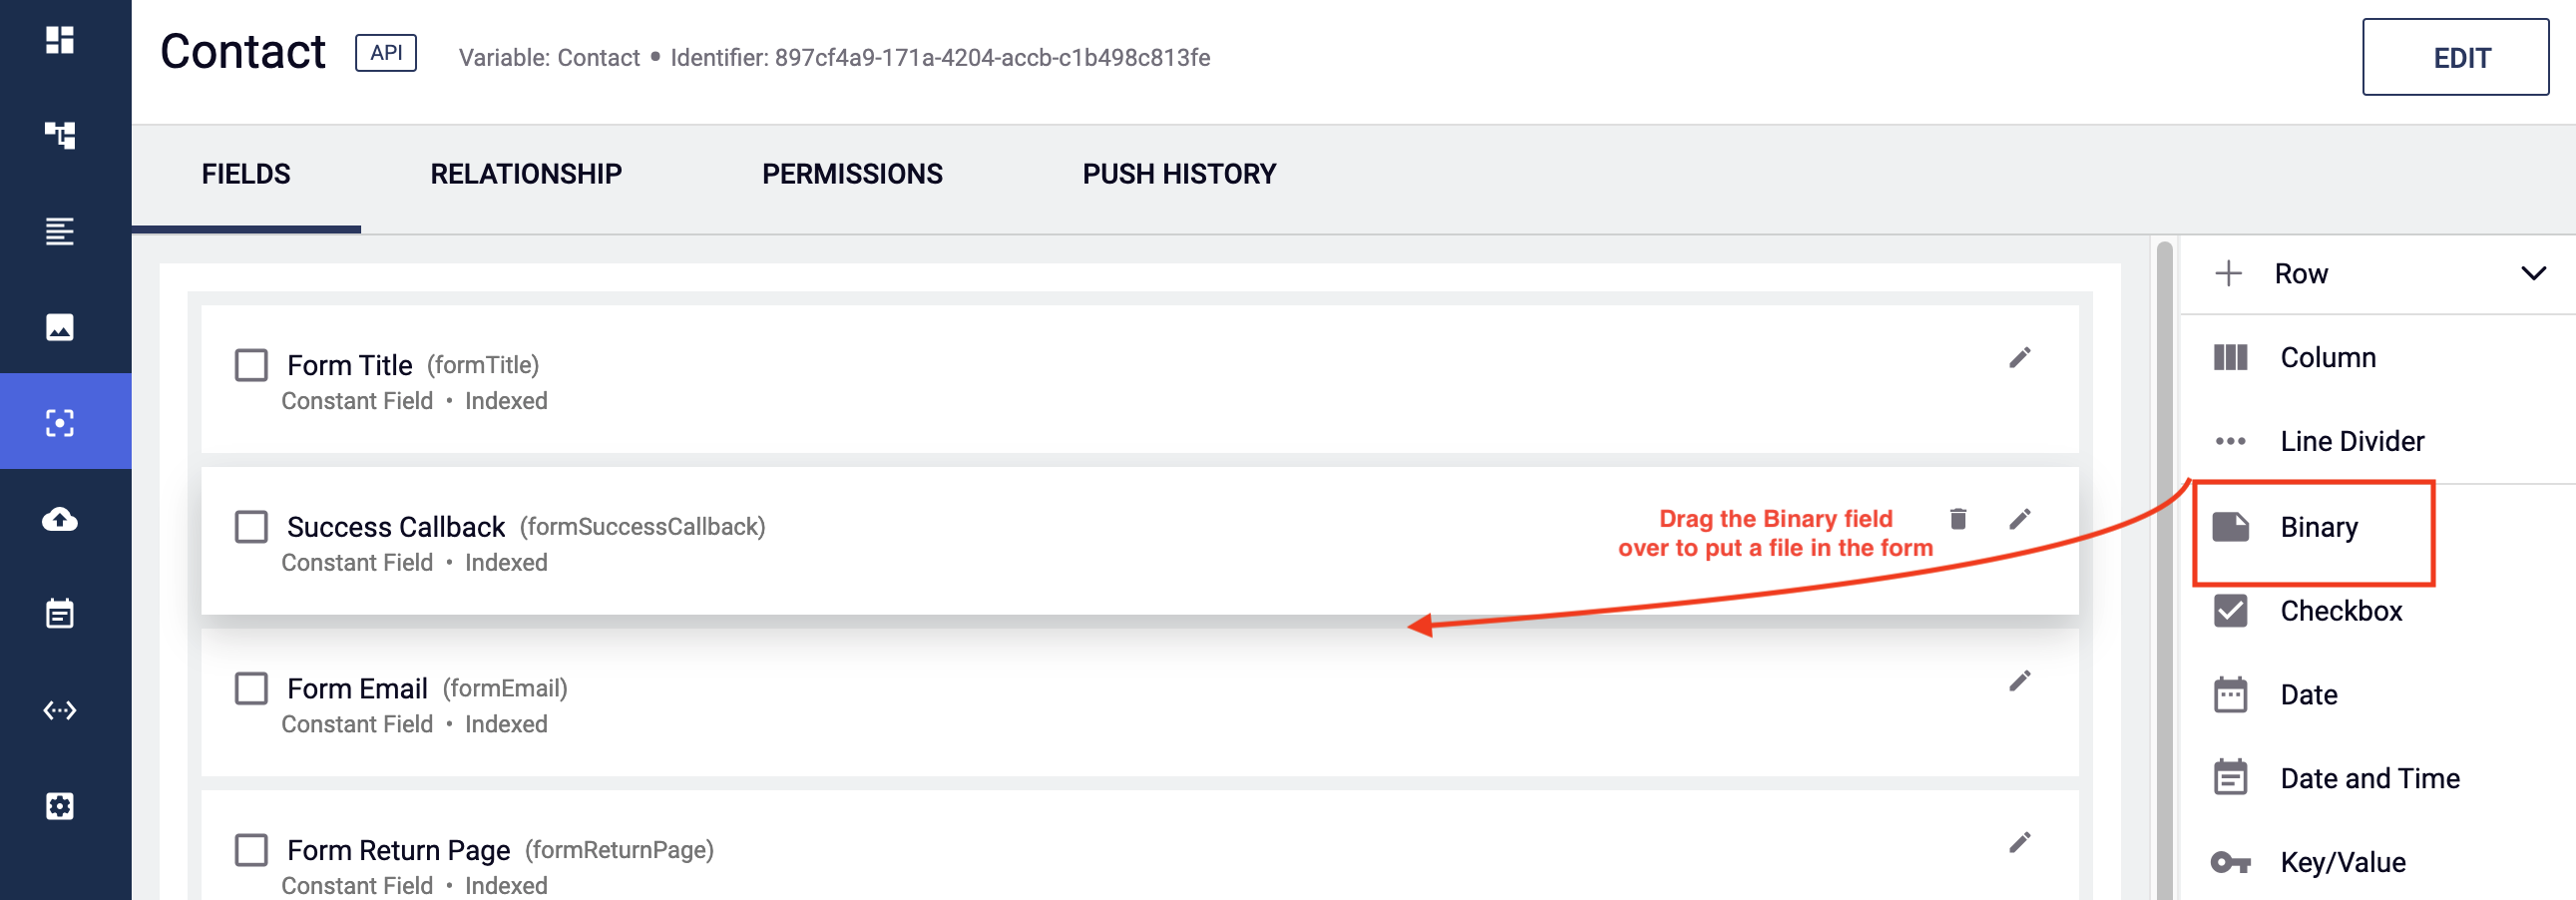
Files can be attached to front end content forms and stored in different ways. Adding a Binary Field to a Form allows the file to be saved with the piece of content added through the form and is the recommended way to set up file contribution on front-end forms.
Image and File fields are also available in the Form Content Type and force the image/file to be saved to the /submitted_content folder in the Site Browser tree.
Important Note: If the /submitted_content parent folder path is not valid, the form will not be successfully submitted and errors may occur. If the parent folder path does exist then the system will create a child folder using the name of the form and store the files attached to the front end form in that child directory (ie: /submitted_content/formName/myFile.jpg). The submitted files are visible and editable from the Site Browser tab.
Default Workflow Action in Forms
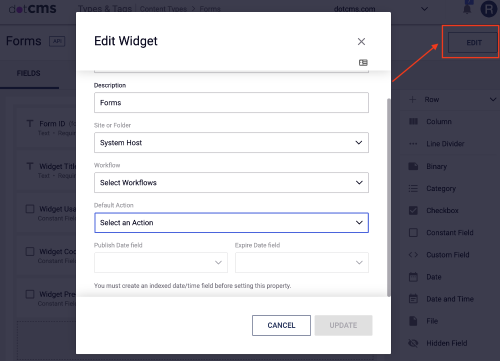
When a form is submitted it will only execute one Workflow Action. You can choose what Workflow Action is done by doing the following:
- Got to the Form Content Type
- Click Edit in the right upper corner
- Set Default Workflow Action to the action you would like
To send emails after the completion of the form, the Send Form Sub-Action needs to be the default Workflow Action.


