The Content Search Manager allows you to Search Content, Add/Edit Content, or Import Content by uploading a file. This article shows you how to import content with a file.
Importing a CSV File
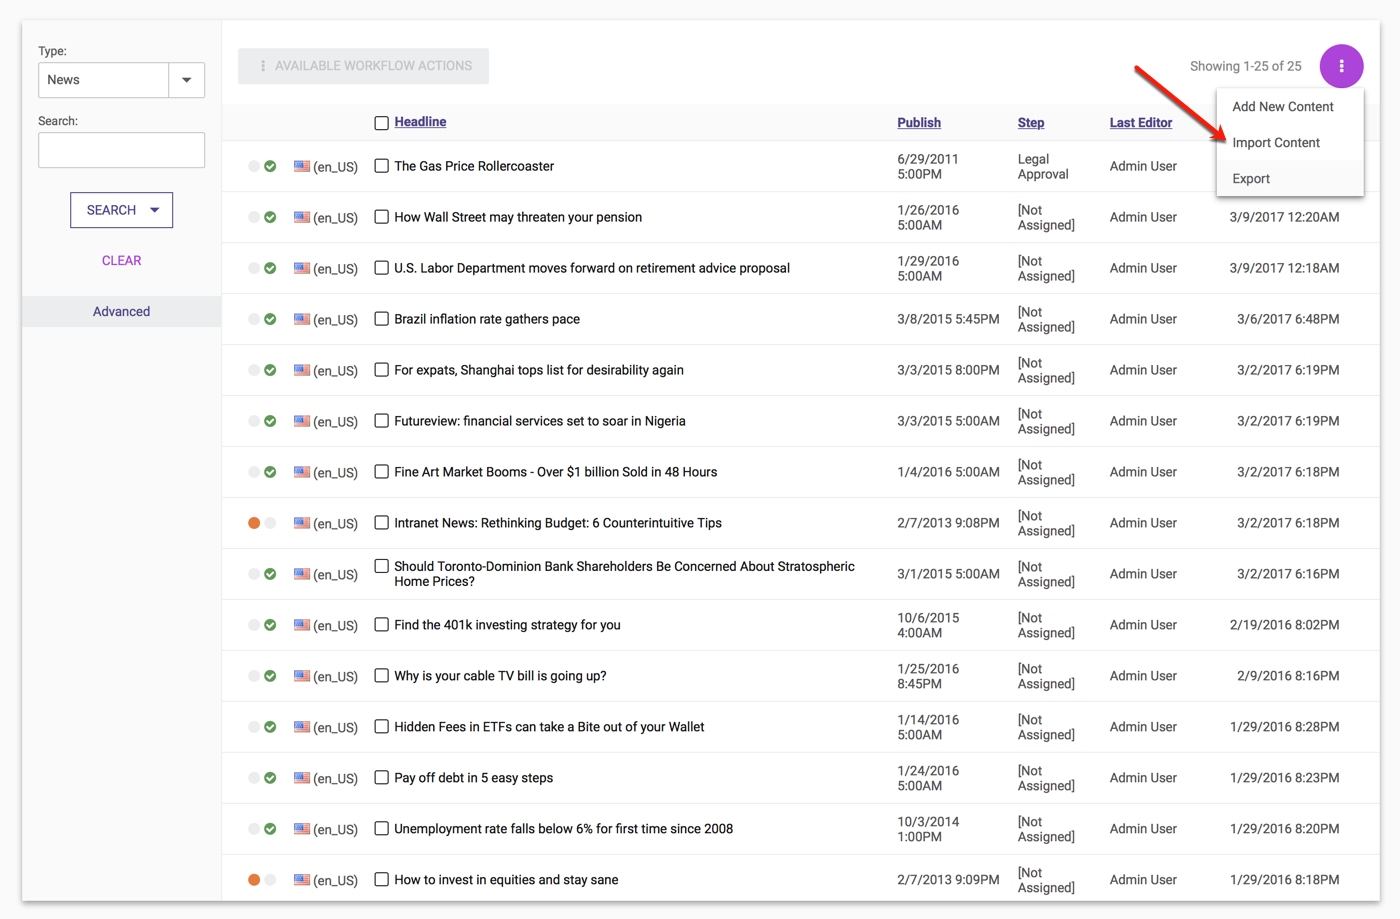
To import a CSV file, first click on the Content tab to display the Content Search Manager, then click on the “Import Content” link.
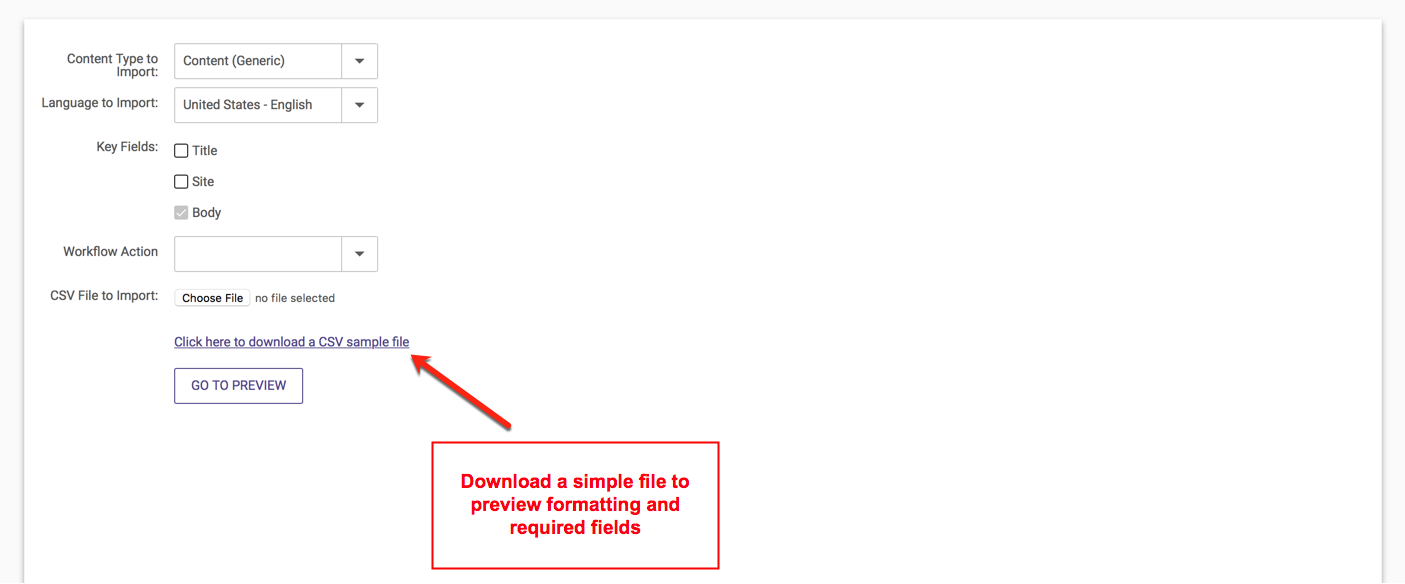
The Import Content popup appears, fill in the values to specify how to import the data:
1. Choose the Content Type for importing
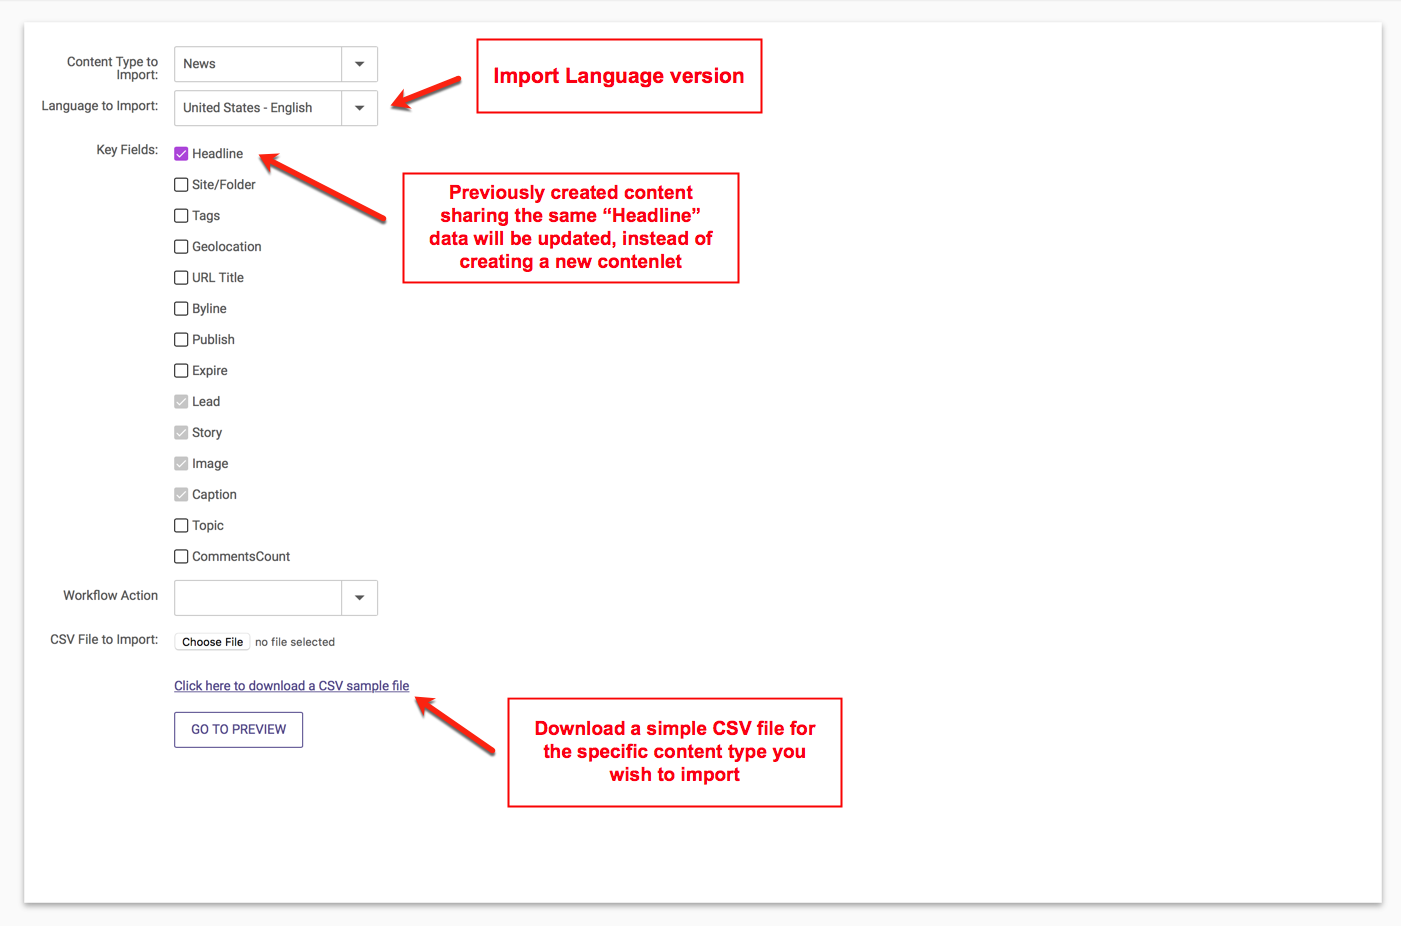
Click Content Type to Import and choose the Content Type you wish to use for importing content. All content you import will be imported as content items of the Content Type you select.
2. Preview a CSV file with the necessary format
- Click the Click here to download a CSV example file link to preview a sample CSV file with the necessary field headings needed by the Content Type.
- Populate each column in your CSV file with the proper data (as shown below).
- Save the file in CSV format.
Important:
- Formats for each column heading must be respected for the import to succeed.
- Date column headings must have properly formatted dates, and must not be left blank or “null”.
- If you are not sure about the formatting of a particular column heading, please preview fields in your selected Content Type prior to importing content.
3. (Optional) Select the Workflow Action to Use
You may select the Workflow Action to be used to import the content. The Workflow Actions available are determined by the Content Type; any Workflow Action which is available to NEW content for the Content Type (in all the Workflow Schemes assigned to the Content Type) may be selected.
Default Workflow Actions
If you don't select a Workflow Action to use for the Import, the Default Workflow Action for the Content Type will be used, as appropriate for the content being imported. Specifically, if the content being imported does not already exist, the Default NEW Workflow Action will be used, otherwise the Default EDIT Workflow Action will be used.
4. Import the file
Once the CSV (comma delimited), file is ready for import, the following three fields must be populated to begin the import process:
| Field | Description |
|---|---|
| Content Type to Import | Choose the Content Type that matches your CSV import file. |
| Key Fields | Used to match imported data with existing dotCMS content. Please see below for more information. |
| File to Import | Click the Browse button to locate the CSV file to upload on your local machine. |
Updating Existing Content
By default, all imported content will be created as new content unless the imported content matches an existing content item of the selected Content Type. There are two ways to match imported content with existing dotCMS content:
- An Identifier column matches unique dotCMS identifiers in the imported data and existing content.
- This is the preferred way of updating content via an import, since it ensures that specific content items are matched appropriately.
- Key Fields match the values in selected Content Type fields between the imported data and existing content.
Identifier Column
When the CSV file contains an identifier column, the dotCMS identifier for each imported item will be matched with content identifiers already in the system. Content with matching identifiers will be automatically updated by the import.
Note:
- When you export content from dotCMS to a CSV file, the identifier column is always included.
- If no dotCMS content exists that matches the value in the identifier column, then dotCMS will attempt to match the values of any Key Fields in the imported content.
- If neither the the values in the identifier column nor the Key Fields match, then the content will be imported as new content.
- When the identifier field is present it will always be used.
- The identifier field does not appear as a “checkable” Key Field, and should merely be added as an additional column in the CSV import.
- Identifiers will be checked by the importer before Key Fields.
Key Fields
When performing imports generated from external systems that have no knowledge of dotCMS identifiers, you can use Key Fields to updating pre-existing content via an import.
- If a Key Field is selected, all Content with a match in the Key Field will be updated by the record in the CSV file.
- Multiple keyfields may be selected to ensure an exact match and update upon import.
- To be an eligible Key Field, the field on the content type must have the System Indexed property enabled.
- Fields shown with disabled checkboxes can not be used as Key Fields.
Previewing Results
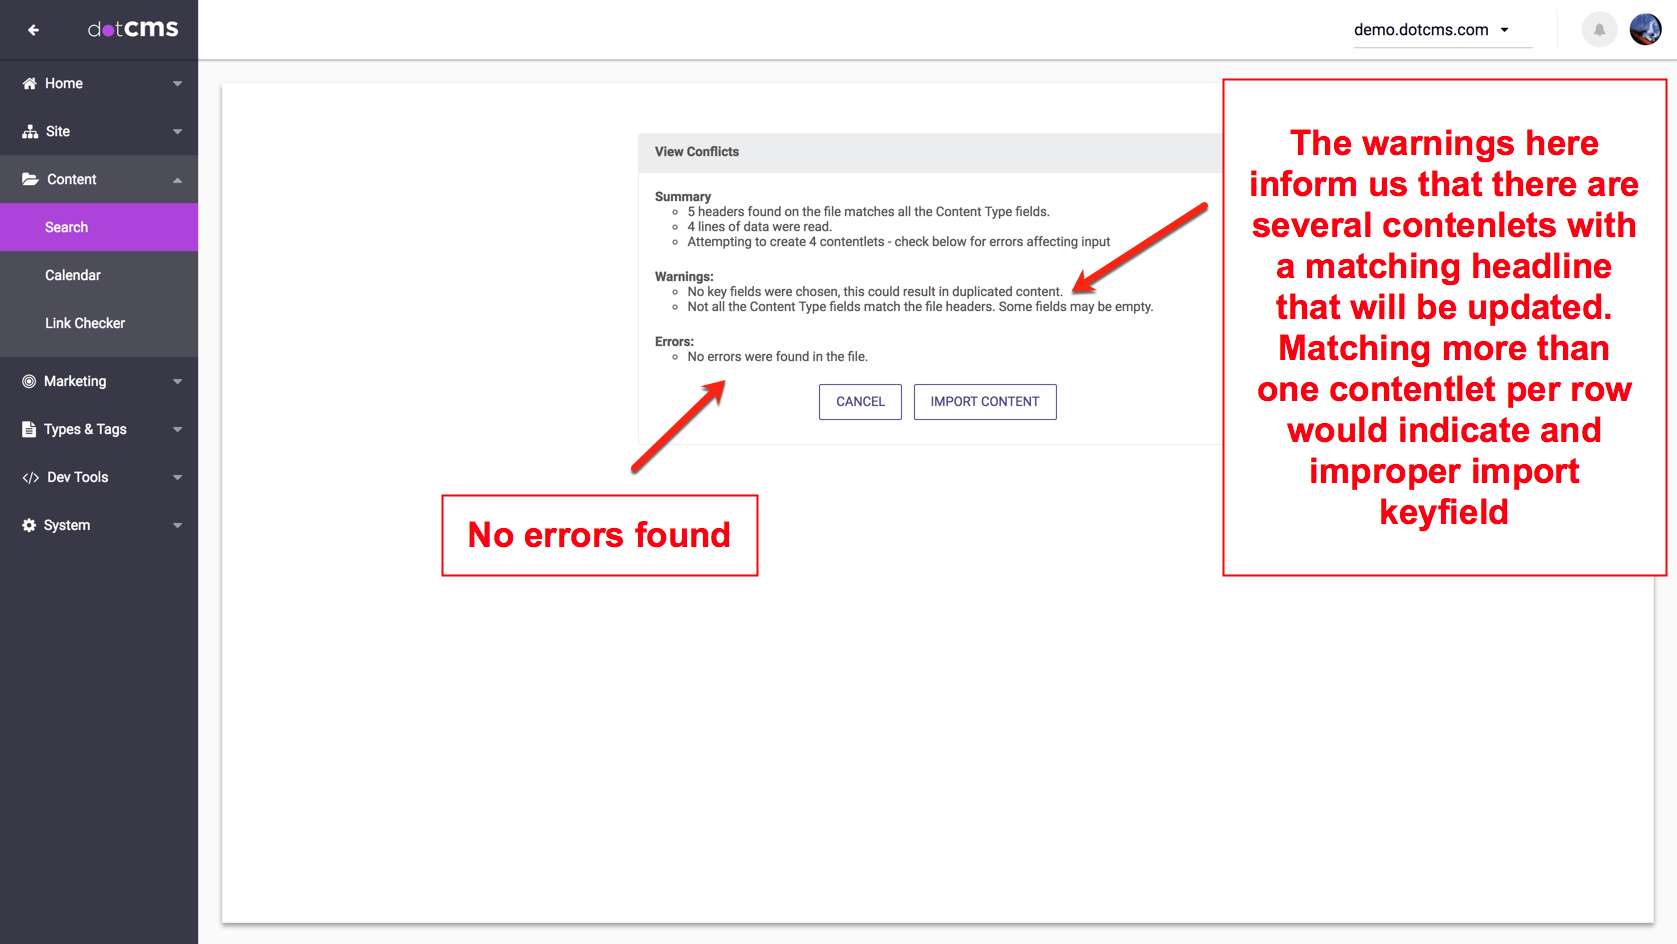
Clicking the Go to Preview button generates a preview of the expected results of the import, without actually importing the Content. Before importing your content, examine the Preview Analysis Results to make sure that there are no warnings or errors that might interfere with a successful import of Content.
If any errors or warnings display in the preview, you may wish to click the Go Back button and correct the CSV file. Once you're satisfied with the import preview, click the Proceed to Import button to import the content.
Depending on the amount of content being imported, the import may take some time. Once the import process is complete, check the Content tab to view the imported content.
Importing Images
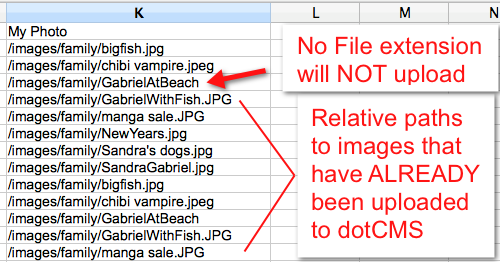
If the content type has an image field, images can be imported to the content as long as the images HAVE ALREADY BEEN UPLOADED to the Site Browser tree (Site -> Browser). Please note that the image paths in the CSV file (shown right), correspond to the dotCMS Site Browser tree on the host being imported to, NOT to the local file system of the user who is doing the import.
If the file in the import does not have a proper image file extension, it will not be uploaded to the content. A row should be left blank under the image column if no image is associated with the content being imported.
Importing Related Content
You can also import related content from the Content Search screen. Please see the Importing Related Content documentation for more information.
Importing Content with Special UTF-8 Characters
When using the Import Content tool users could see unexpected data changes when uploading UTF-8 files. This is due to the fact that by default special UTF-8 characters are replaced with their HTML counterpart.
To change this behavior and have all UTF-8 characters used in their original form change the property CONTENT_ESCAPE_HTML_TEXT in the dotmarketing-config.properties file to FALSE.


